NetSuite
Use this guide when Core8 needs NetSuite only for invoice creation from the billing approval flow. It covers the exact permissions, prerequisites, connection steps, and verification points for the current plugin-only setup.
If Customer Success is sending a shorter NetSuite-only checklist to the customer's NetSuite integrator, use the NetSuite Integrator Handoff.
What you’ll do
- Generate a certificate in Core8 and complete the NetSuite M2M setup.
- Connect NetSuite to Core8 using the required NetSuite IDs.
- Configure the required defaults and mappings Core8 needs for invoice creation.
- Verify the setup on one invoice before wider use.
Access
- Only managers can manage integrations.
- Open Settings → Integrations (URL:
/{orgId}/integrations). - Some integrations may be disabled in your organization. If the NetSuite tile is disabled, contact Core8 support.
What you’ll need
From NetSuite:
- Account ID from
Setup → Company → Company Information - Client ID from the NetSuite integration record
- Certificate ID from the NetSuite OAuth 2.0 Client Credentials mapping
From Core8:
- Access to the NetSuite integration Connection tab (
/{orgId}/integrations/netsuite?view=connection) - A generated Core8 NetSuite certificate (
.pem) ready to upload into NetSuite
Prerequisites
- Create at least one active subsidiary in NetSuite before setup.
- Create at least one payment term in NetSuite before setup.
- Make sure the products used on approved invoices already exist in NetSuite and use an invoice-eligible subtype such as Sale or Resale.
- If the organization uses multiple currencies, enable Multiple Currencies in NetSuite before connecting Core8.
- Create the PDF language custom record/list values used by
custentity_il_pdf_lang; Core8 requires a default PDF language when it creates NetSuite customers. - If the organization uses industry or taxpayer ID mappings, create those custom lists and fields in NetSuite before mapping them in Core8.
- Use a dedicated NetSuite integration role for Core8 instead of reusing a broad admin role.
Required NetSuite Role Permissions
Create or customize a dedicated integration role in NetSuite and give it these permissions for plugin-only invoice creation.
Setup tab
| Permission | Level |
|---|---|
| REST Web Services | Full |
| Log in using Access Tokens | Full |
Transactions tab
| Permission | Level |
|---|---|
| Invoice | Full |
| Find Transaction | View |
Reports tab
| Permission | Level |
|---|---|
| SuiteAnalytics Workbook | Edit |
Lists tab
| Permission | Level |
|---|---|
| Customers | Full |
| Items (including Discount Items) | Full |
| Subsidiaries | View |
| Terms | View |
| Currency | View |
| Billing Schedules | View |
| Customer Categories | View |
| Accounting Periods | View |
Custom record permissions
Add PDF language access for every Core8 NetSuite billing setup. Add industry access only when the org maps industry values.
| Permission | Level |
|---|---|
| Custom Record - il_supp_langs | View |
| Custom List - esc_industries | View, when used |
Do not use the NetSuite Administrator role for the Core8 integration user. NetSuite restricts employee/personnel record access for administrator users in ways that can break Core8 personnel sync behavior. Use a dedicated non-Administrator integration role with the permissions above.
Step-by-step: Connect NetSuite
1) Enable required NetSuite features
In NetSuite: Setup → Company → Enable Features
- REST Web Services
- OAuth 2.0
- SuiteAnalytics Workbook
Core8 uses REST Record APIs plus SuiteQL-backed lookups during invoice creation, so SuiteAnalytics Workbook must stay enabled.
2) Copy your NetSuite Account ID
In NetSuite: Setup → Company → Company Information
Copy the Account ID exactly as shown. Examples:
12345671234567_SB2
3) Create the NetSuite integration record
In NetSuite: Setup → Integration → Manage Integrations → New
- Create an integration record for Core8.
- Set State to Enabled.
- Check Client Credentials (Machine to Machine) Grant.
- Under OAuth 2.0 scopes, enable REST Web Services.
- Save the record and copy the Client ID.
4) Generate the certificate in Core8
In Core8:
- Open Settings → Integrations.
- Click the NetSuite tile.
- In the Connection tab (
/{orgId}/integrations/netsuite?view=connection), click Generate Certificate. - Download the generated
.pemfile.
Certificate details:
- Core8 generates a self-signed RSA 4096-bit certificate for NetSuite.
- The certificate is valid for 2 years.
- The downloaded
.pemfile is the public certificate that you upload to NetSuite. - The private key stays stored encrypted in Core8.
Core8 shows the certificate expiry in the UI. When the certificate is getting close to expiry, generate or renew it in Core8 and update the NetSuite certificate mapping.
5) Create the NetSuite OAuth 2.0 Client Credentials mapping
In NetSuite: Setup → Integration → Manage Authentication → OAuth 2.0 Client Credentials (M2M) Setup
- Click New.
- Select:
- User: your NetSuite integration user
- Role: the dedicated Core8 integration role
- Application: the integration record you created
- Certificate: the
.pemfile generated by Core8
- Click Save.
- Copy the resulting Certificate ID.
NetSuite does not copy M2M client credential mappings from production to sandbox, and sandbox refreshes clear the mapping. Set up the mapping separately in each NetSuite account. NetSuite also allows up to five active certificates per integration record.
6) Enter the IDs in Core8 and connect
Back in Core8 on the NetSuite Connection tab:
- Enter:
- NetSuite Account ID
- NetSuite Client ID
- NetSuite Certificate ID
- Click Connect.
To connect a sandbox environment, use the dropdown next to Connect and choose Connect to Sandbox.
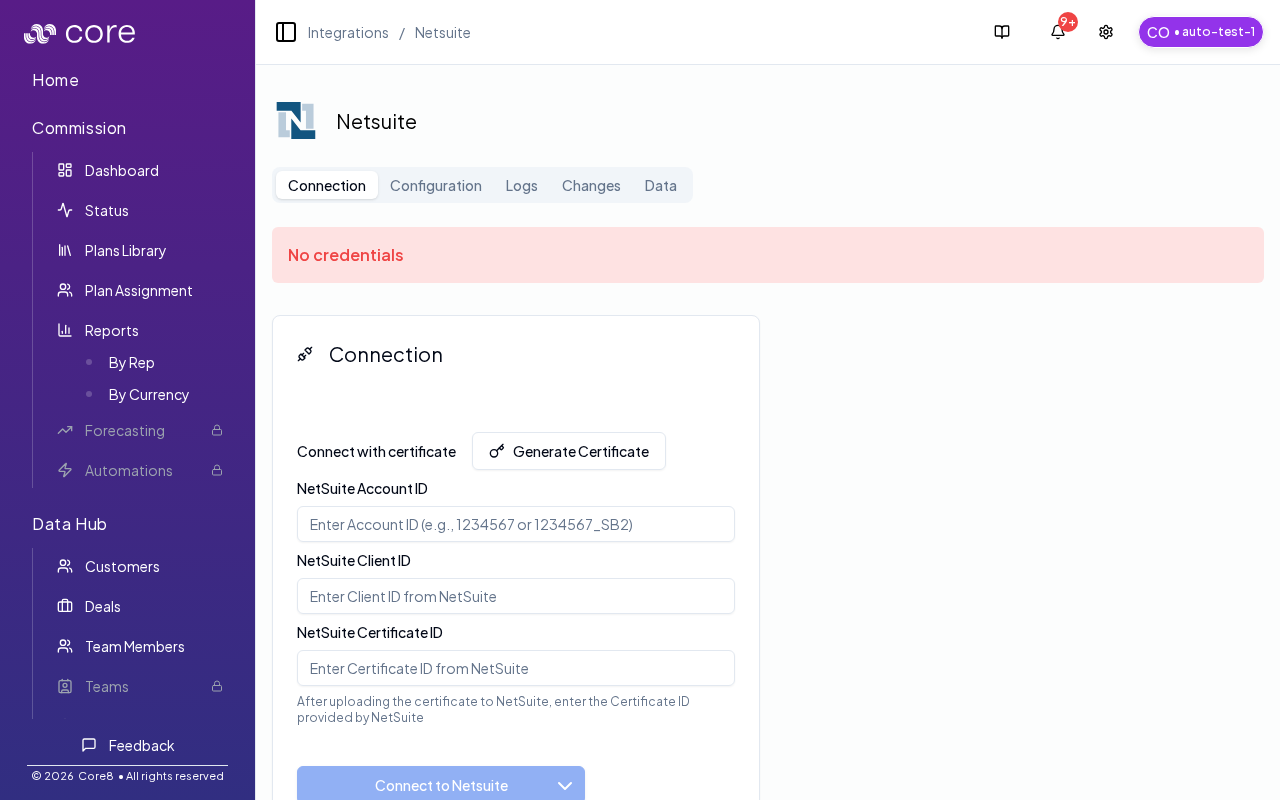
If you have not connected NetSuite yet, the connection page may show a “No credentials” banner until you enter the Account ID, Client ID, and Certificate ID.
7) Read configuration data
After Core8 connects, click Read configuration data on the Connection tab. This loads NetSuite subsidiaries, terms, currencies, tax items, classes, billing schedules, account-specific required custom fields, and other choice lists into the Configuration tab.
If the Configuration tab says configuration is not loaded, return to the Connection tab and click Read configuration data before saving mappings.
What Core8 Uses In NetSuite For Invoice Creation
| Object | Support | Notes |
|---|---|---|
| Customers | Reused or created | Core8 looks up a customer by external ID and creates one when the approved billing flow does not already have a matching NetSuite customer. |
| Invoices | Reused or created | Core8 looks up invoices by external ID before creating a new one, so retries do not create duplicates. |
| Products / Items | Lookup only | Every invoice line must match an existing NetSuite item. Items must already exist in NetSuite and use an invoice-eligible subtype such as Sale or Resale. |
| Discount Items | Lookup or create when needed | If an invoice includes a discount, Core8 can reuse an existing NetSuite discount item or create one automatically. |
| Supporting lists and records | Lookup only | Core8 reads subsidiaries, terms, currencies, accounting periods, and any optional configured custom lists or records used by this setup. |
Required and Optional Custom Fields
Core8 requires the PDF language field when it creates NetSuite customers:
- Custom Record Type
il_supp_langs - Entity field
custentity_il_pdf_lang
Only configure these when the organization wants industry or taxpayer ID mappings in Core8:
- Custom List
esc_industries - Entity field
custentity_esc_industry - Entity field
custentity_il_taxpayer_id
Core8 only needs the optional fields when those mappings are part of the billing setup.
Multi-currency and Capacity Notes
- If the organization works in multiple currencies, enable Multiple Currencies in NetSuite before setup.
- Treat the NetSuite base currency as a setup-time decision. It should not be planned as something to change later.
- Currency mapping in Core8 depends on NetSuite currency data being available through the integration.
- NetSuite enforces per-user and integration concurrency limits.
- Heavy invoice volume can hit NetSuite rate or concurrency limits.
- If the customer expects heavy volume, review NetSuite licensing and capacity, including SuiteCloud Plus where relevant.
Configure in Core8
After connecting, open the Configuration tab (/{orgId}/integrations/netsuite?view=config) to configure:
- Required defaults such as customer subsidiary, payment terms, and PDF language
- Currency and payment-term mappings used during invoice creation
- Optional field mappings such as Additional CC Emails and invoice Record ID
Verify On One Invoice
Run one billing approval end to end before wider rollout.
- Approve one invoice in Core8 using a deal with a resolved billing subsidiary.
- Confirm the invoice appears in NetSuite.
- Confirm the customer exists in the expected subsidiary.
- Confirm each invoice line matched an existing NetSuite item.
- If the invoice used a discount, confirm NetSuite applied a discount item.
- If the invoice date falls in a closed or missing accounting period, confirm NetSuite used today’s date instead.
Verify and troubleshoot in Core8
Use the NetSuite integration tabs:
- Logs (
?view=logs) for integration issues and failures - Changes (
?view=changes) to review sync changes - Data (
?view=data) to inspect synced objects
Troubleshooting
- Invalid grant / invalid certificate: confirm the
.pemgenerated in Core8 is the same certificate uploaded in NetSuite and that the Certificate ID copied into Core8 matches the saved NetSuite mapping. - Wrong Account ID: confirm the exact Account ID string from NetSuite Company Information. Sandbox account IDs often include a suffix such as
_SB2. - 401/403 unauthorized: verify the integration user is using the dedicated Core8 integration role and that all required permissions listed above are present, including SuiteAnalytics Workbook.
- Configuration not loaded: click Read configuration data on the Connection tab, then return to the Configuration tab.
- Empty subsidiary list: create at least one active subsidiary in NetSuite.
- Missing payment terms: create at least one payment term in NetSuite.
- Missing PDF language options: create the
il_supp_langsrecords and confirm the integration role can view them. - Invoice lines fail because products are missing: create the products in NetSuite first and make sure they use an invoice-eligible subtype such as
SaleorResale. - Invoice date is ignored: confirm the invoice date falls inside an open NetSuite accounting period. If not, Core8 lets NetSuite use today’s date.
- Discounted invoices fail: confirm the integration role can access items and discount items.
- Missing optional field choices: create the matching custom record, custom list, or entity field in NetSuite before trying to map it in Core8.
- Slow or intermittent sync under load: review NetSuite governance, concurrency limits, and licensing capacity before treating it as a Core8 mapping problem.